Friday, March 22, 2013

My Core'dinations Creative Frenzy!

"Simply Elegant"

Click Here for Brief Step Out


"Discovery"

*****************************************************************

"Love Struck"

Click Here for Brief Step Out

*****************************************************************

Thank you for allowing me to try out for the Core'dinations 2013 Design Team!

Love Struck Brief Step Out

 This layout was easy breezy, and really a basic technique used on the Core'dinations card stock.


For the photo mat, I merely used an embossing folder that fit the theme of my lay out, and then once it was embossed, I tore the edges, lightly sanded the raised embossed image, and ran a light tea stain color of ink over it. A bit of black pigment ink around the edges for a bit of a masculine effect.


For the embellishment mats, I tore the correct sizes needed for each sticker, then crumpled them, flattened, and crumpled again. I repeated this one more time, then lightly sanded the card stock to let the yellow core show through just a bit.

For me, I often use pigment inks instead of dye based inks. I find they have a richer feel to them, and it translates into for texture in my projects. Here I used a brown pigment ink lightly applied to the creases and edges.

Add a few wraps with some light weight craft wire, and of course some bling. On this lay out, I used the iRock from Imaginisce.

Thursday, March 21, 2013

Graphic 45 Design Team 2013 Audition

Glue guns down, cardstock to the edge of your desk... reminiscent of school days, ya? 
Well this my crafty peeps is the end of a long, long week.  I have been creating and compiling a selection to showcase...


Here is my Graphic 45 Design Team 2013 Audition:


"Congratulatory Wedding Card"
Graphic 45 "Secret Garden" 8 by 8 Paper Collection and Sentiment
Click Here for Brief Step Out

**************************************************


"Simply Elegant"
Click Here for Brief Step Out

**************************************************

"Ladies Personal Box"
Graphic 45 "Tropical Travel Lodge" Paper Collection
Graphic 45 Metal Butterflies
Graphic 45 Metal Buttons

Graphic 45 "A Ladies Diary" Tags

Click Here for Brief Step Out
************************************************************

"Expecting"
Graphic 45 "French Country Collection", and "A Ladies Diary Collection" Papers
Graphic 45 "A Ladies Diary" Chipboard Tags

Other Products Used:

Stickles
Misc flowers
ClearScraps XL Shapes
Martha Stewart Foiling
Tim Holtz Flower Ribbon
Technique Tuesday Stamps
Clearsnap and Ranger Inks


**************************************************************

"Truth Card"
Misc Scraps, Fussy Cut and Stickled

***********************************************************
"Heritage Plate"
Graphic 45 "Secret Garden" 8 by 8 Papers Collection
Graphic 45 "Secret Garden" Banners Collection

Graphic 45 "Secret Garden" Tags and Pockets Collection

Click Here for Brief Step Out


***************************************************************


Thank you so very much for the opportunity to audition for the 
 2013 Graphic 45 Design Team!


"Heritage Plate" Brief Step Out

"Heritage Plate"
Graphic 45 "Secret Garden" 8 by 8 Papers Collection
Graphic 45 "Secret Garden" Banners Collection

Graphic 45 "Secret Garden" Tags and Pockets Collection


Starting with a Dollar Store Metal Plate, I applied Ranger Alcohol Inks and Sprayed with an acrylic matte coating.
Once all of the embellishments had been applied, I used Ice Resin to the tops of the banners, pocket, and the fussy cut rose. A bit of Stickles were added to the edges of the roses for a bit of bling.

"Congratulatory Wedding Card" Brief Step Out


Congratulatory Wedding Card

Graphic 45 "Secret Garden"
Cored'inations Cardstock
Misc flowers and ribbons
Stickles
ATG Adhesive Gun
Spellbinders Emboss/Deboss Plate
Ranger Distress Ink in Tea Dye
Lock-tite Super Glue Gel

The Tea Dyed de-bossed mat for the sentiment was actually a piece of scrap that I
de-bossed and burnished with ink to give some texture and contrast to the front of the card.
A few dabs of stickles added to the flowers gave it a bit of femininity with out making it too girly.


"Simply Elegant" Brief Step Out


Simply Elegant Layout

Anna Griffin Flocked Back ground Paper
Black pigment ink
Dove of the East Ribbon
iTop Brad from Imaginisce
Cardstock from Stash and Cored'inations
Clearsnap Smooch
ATG Glue Gun

Using an embossing folder, I created some added texture, sanded, then tore the edges. Lastly, I applied gold Smooch to give the embellishment a bit of a gilded look. Adding the iTop brad that is covered with the same flocked paper as the background, provided a slightly monochromatic effect.


"Ladies Personal Box" Brief Step Out


Ladies Personal Box

Plain White Close to my Heart Recipe Box
Graphic 45 "Tropical Travel Lodge" Papers
Graphic 45 Metal Butterflies
Graphic 45 Metal Buttons
Graphic 45 A Ladies Diary Tags 1
Flower from Stash
Black Acrylic Paint
Tree House Studio Clear Matte Coating
ATG Adhesive Gun
A page out of an old book
EK Punch

With my embossing folder and Vintaj machine, I embossed a zebra pattern onto the Graphic 45 Metal Butterfly. Then by adding a little black stickles, inks, and some craft wire, it became a full butterfly!

Using an EK flower strip punch to make the flower, I layered the Graphic 45 Metal Button and chip board tag to create the "knob" for the box.

Just a nice coat of paint, 
and papers on opposite sides 
to complete the interior.

Wednesday, March 20, 2013

Fun Ways to leave a message and stay organized!

Today is the first day of Spring!

Are you ready? Organized??

When we have busy lives, children, or in my case now, grandchildren, it is really easy to become disorganized!

These projects are a fun and easy way to get and STAY organized, leave messages for your sweeties, and be creative!!

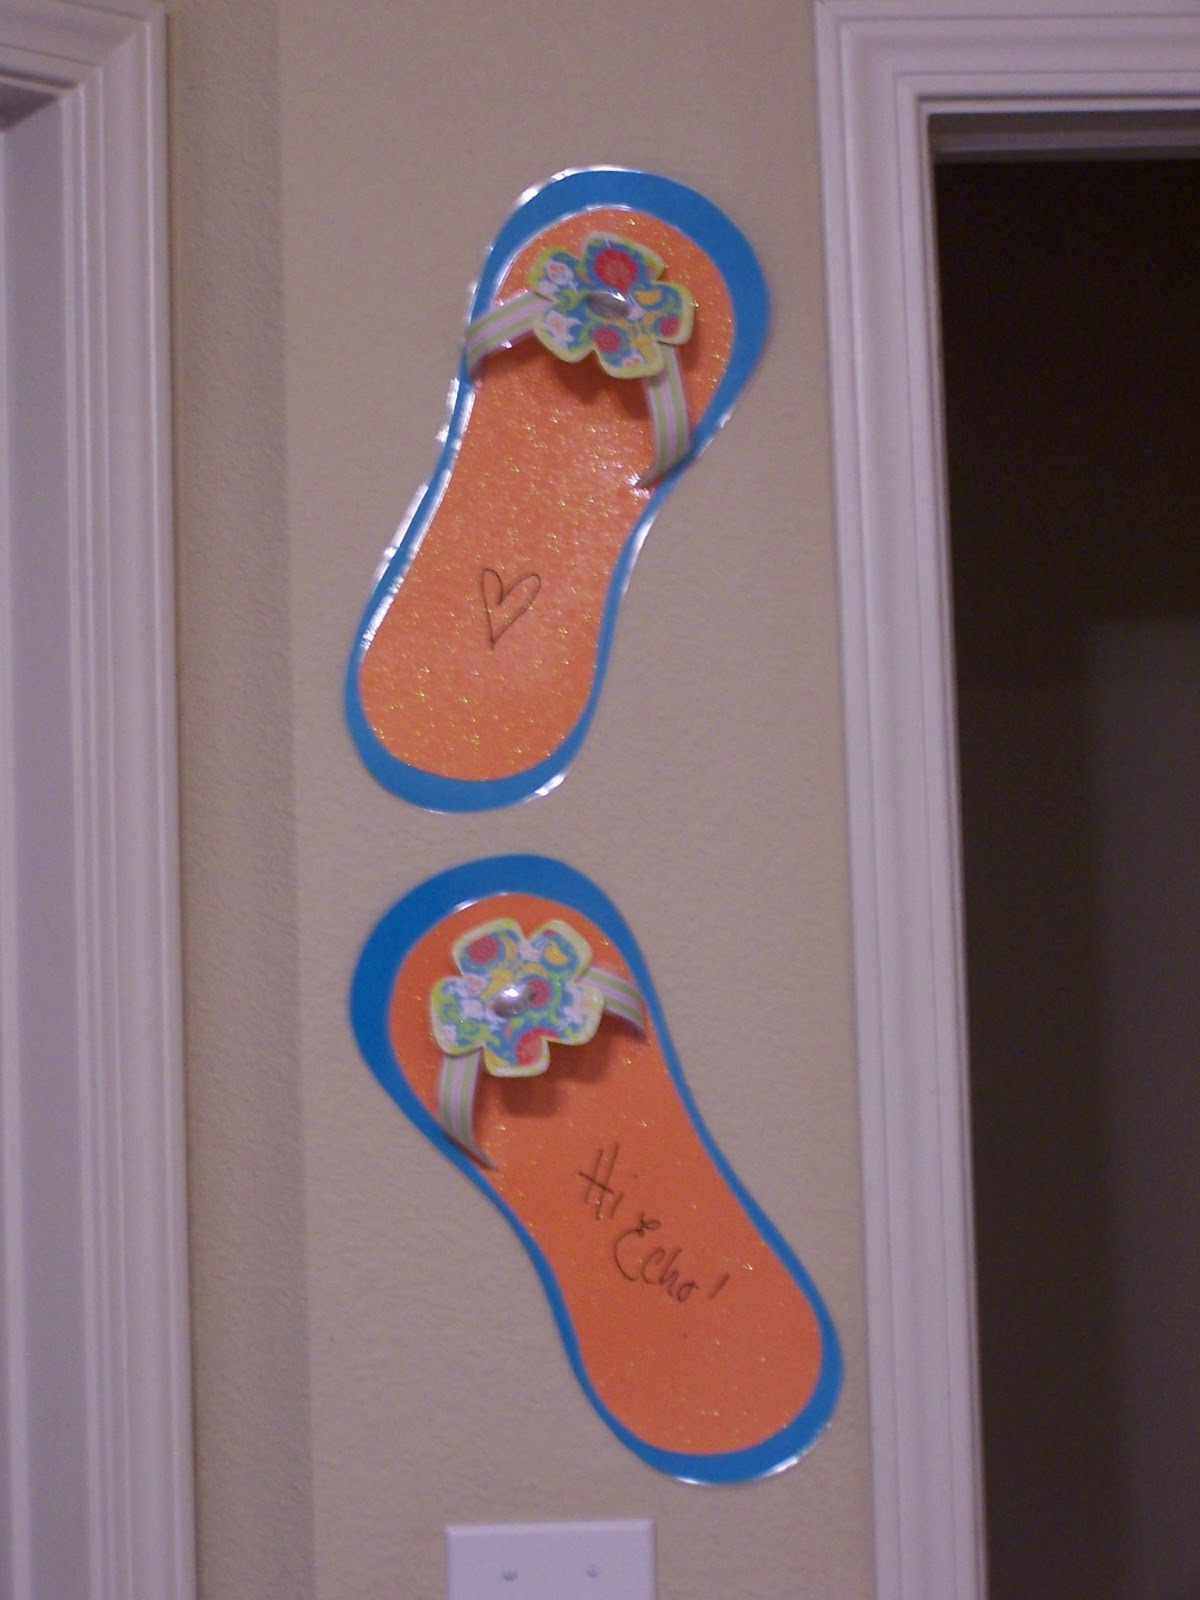
Step one, choose the size and shape of your message board. Here, I chose a flip flop (too cute!), and then used a contrasting color in ribbon for the "straps" and then added the flower. Of course it HAD to be glitter paper!

Laminate the message board, and attach any 3-D elements you may want to add.
With my flip flops, I just added two strips of empty laminator sheet, and adhered ribbon to the top for straps. Attach the flower and add a big rhinestone for extra bling.

The secret is, that when you laminate something, it becomes dry erase! The possibilities are just endless. Check out the project to the left for a twist on this same type of project.
This time we included a little box for holding the dry erase pens. Clever!


 Here we used a die cutting machine to cut out "Messages" and adhered to the message broad prior to laminating.
We included a mat for this cut little cork board add on too. No more losing that Target receipt!

Hopefully this quick little post has given you some ideas on how to get ready for Spring!

Hoppy Spring, and Happy Crafting!
XO,
V.

Thursday, February 28, 2013

Quickly alter a flower?

You can quickly alter a flower or any other time of embellishment with the use of an enhancer or two. I love enhancers. This would be mists, inks, paints, glitter glues, etc.

Take a look at this white fabric flower. They come on a strip, so you can make a border or cut one off and use individually.. I layered it with a very inexpensive daisy from a big box store. I just buy them in bunches, uber inexpensively, and then take them apart for use later.


Then I misted it with Bubble Gum Tattered Angels Mist. Then I used my heat tool to dry it, and added a bit of Glam Pink Stickles, and here ya go!

So go forth and alter!!! Who says you can't do this with flowers you cut from paper..?

Wednesday, February 27, 2013

Challenging your creative Mojo!

There is a new FaceBook group out there, and the members are joining by the droves to get a piece of the action! Ok, not by the droves, but still quite a few new members, and the action is really just a challenge. But I had ya going there for a minute right?

It's all about the presentation. It's everything! The manner in which something is presented can make all of the difference in the world to someone. A piece of plain cardstock is just that, plain, until you present it in a new and different light. So how about you dust off those tools you haven't used in eons and present some cardstock in a new and CREATIVE light??

Click on the link below to get to the group. Join the group. Join the event. Then craft on my sparkly friends, craft on!

Shabby Bling Studio Creative Challenges!


Now go have a SUPER Sparkly Day!

XO,
V.

Wednesday, January 30, 2013

A blast from the past to peruse...

Just went through some old photos while cleaning out the old PhotoBucket account, and came across some older projects. Have you ever noticed how your style and preferences change over time? I truly did not realize how much my choice in supplies has changed in the past couple of years. Here are a few projects that go back a few years...hmmm...need to take some pics of more recent heart art to show ya'll the difference!


The layout above was with Core'dinations card stock, and let me say, once I started using them, I really haven't stopped...so that choice in supplies is still the same...  This card to the right was made with what I had on hand in my scraps I think...but I can see that even back several years ago I loved GLITTER. Maybe not that much has changed? I am thinking maybe it is my style of creating that has changed, not what I choose to create with.          
Has this happened to you too?


  Well this one below is one of my favorite projects ever.... I used Cosmo Cricket paper and coordinating fabric and the iTop from Imaginisce, Clear Scraps, Clearsnap inks and Beacon Adhesives for a great organization board. The project had been originally for my debut on the HSN channel for Purple Cows, but alas it would not fit in my luggage and I was not trusting my samples to arrive via a shipper. Now my dear friend Marti has it hanging in her craft closet and every time I go over there and see it, my heart gets all mushy. Isn't THAT what heart art is about?   Ok, this stroll down memory lane has been fun, time to go get a massage, a kiss from my honey, and my finger gooey in some NEW heart art. What are YOU going to create today?                                                                                                                                     

XO, V.        <3

Monday, January 21, 2013

The season of change...

Well, the time has come to vamp up this blog, get it back on track, mix some of the very old, with the new and no so new.. Please bear with me as I skip down the well worn path into the crafting world again. This time my own way, my own style, and with the loving support of my fam-bam, as an artist and author, a girl jst trying to fly free into her life...

Stay tuned for some changes, and I will be thrilled if ya'll give me your feedback and opinions!

Take care and happy Monday!!

V.